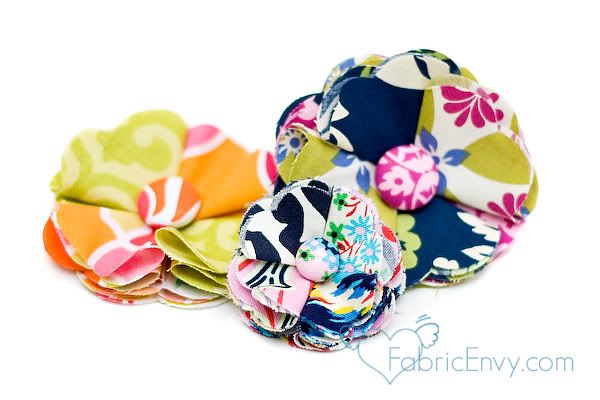
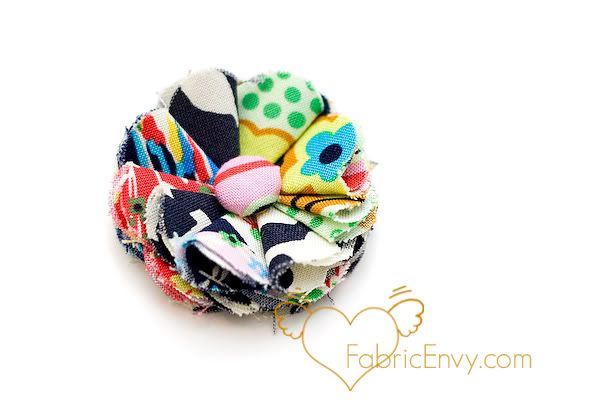
I love making fabric flowers! There are so many ways to use them: from clothing, to hair or bag accessories, to home decor, and the list go on. I love using this particular design to make my little girls hair flowers. I usually sew them to an alligator clip for my 2 and 6 year old. For my little six month old I’ve attached the flower to a piece of Riley Blake Ruffle Elastic in Hot Pink and then made it into a headband, and oh boy (or should a say girl) is it cute!


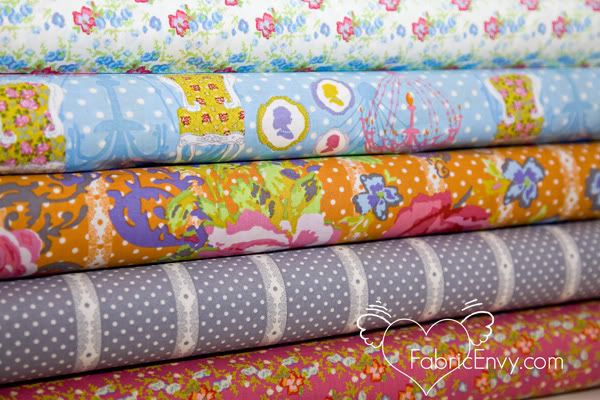
You could easily use scraps to make these flowers, but because I had very specific color schemes in mind I used these Fat Quarter bundles:
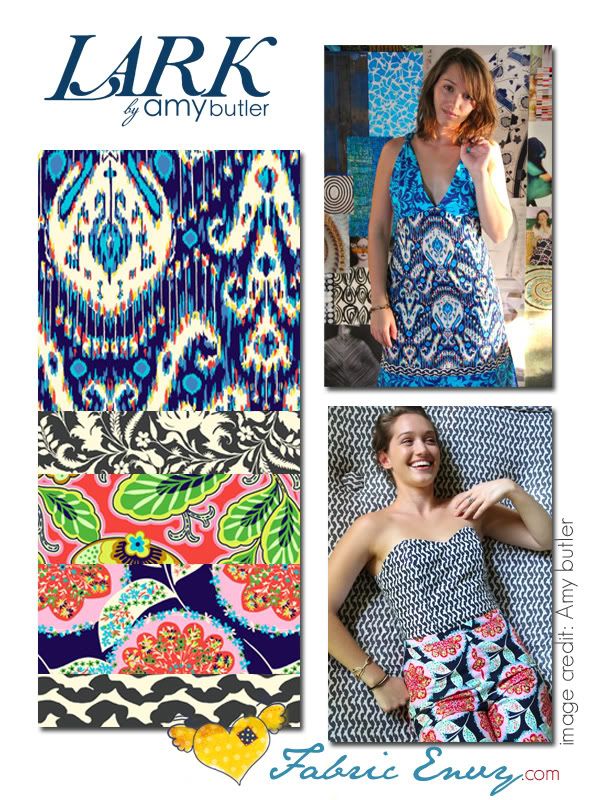
Lark by Amy Butler,
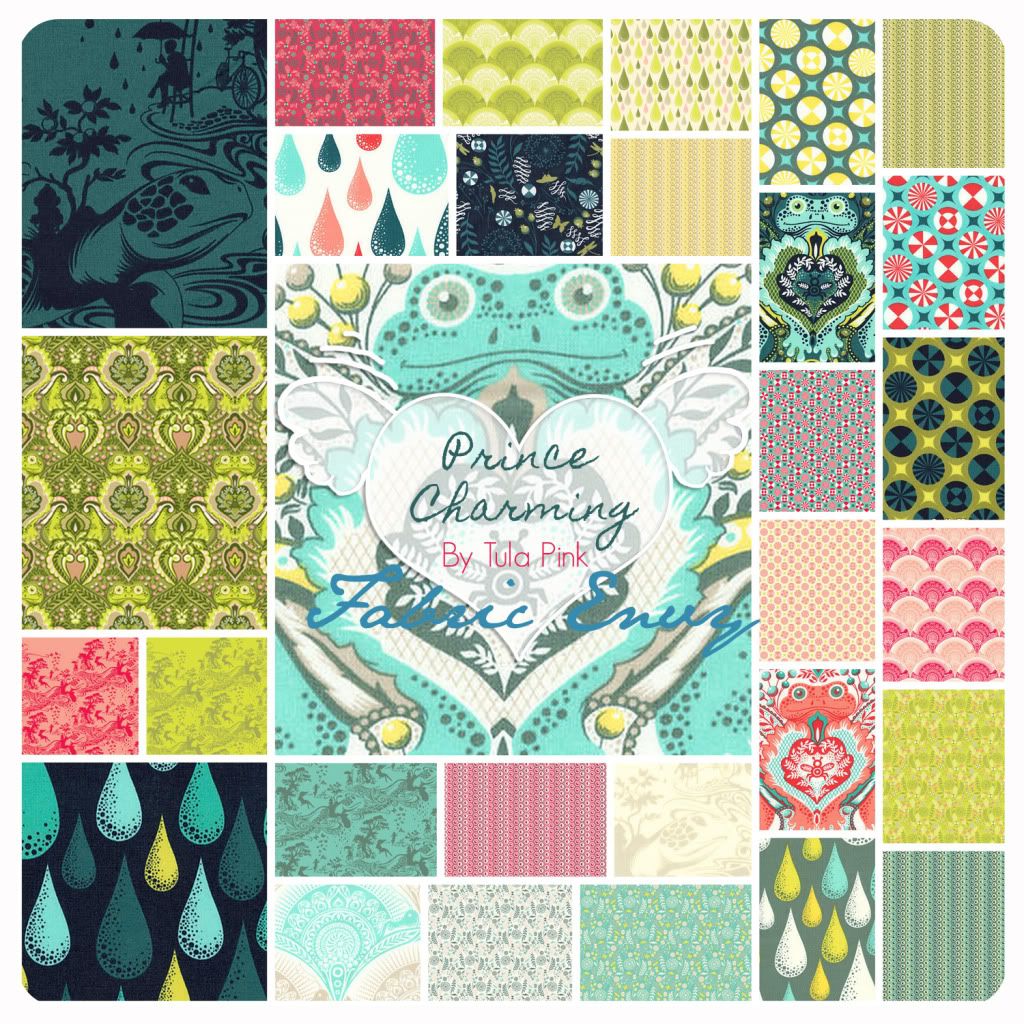
Secret Garden by Sandi Henderson, and
Grand Bazaar by Patty Young. Because it uses so little fabric I’ve got lots of material left over to make little wallets, a clutch, or whatever else I can dream up!
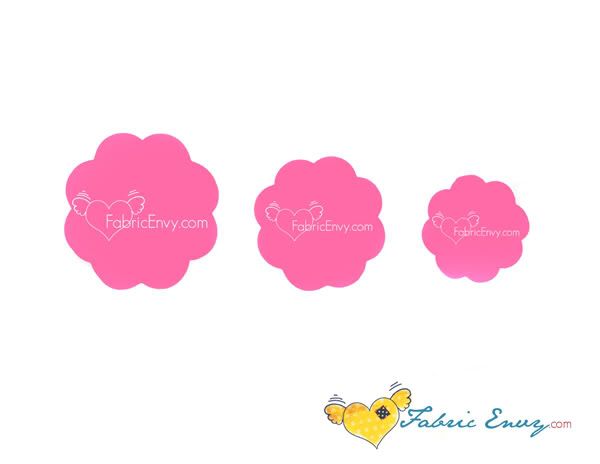
This tutorial will show you how to make the flower. You can use the template to make three different sizes: Small-2 inch, Medium- 2 ½ inch, and Large-3 inch.
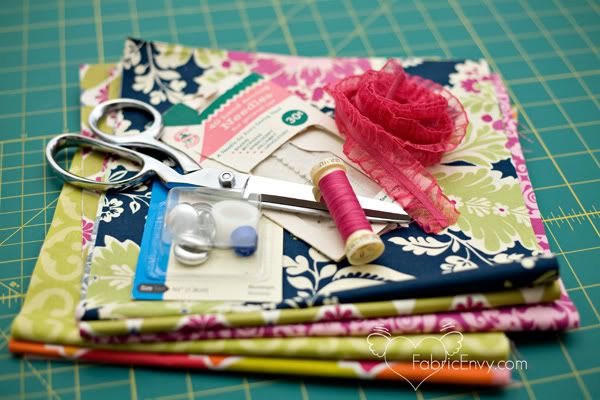
Supply List:
- Print and cut out the template (you can download the full size template here, or by clicking on the picture) for your desired flower size on heavy cardstock that can easily be used for tracing.
- Scissors
- Fabric scraps, for the large flower they need to be at least 3 ¼” x 3 ¼”
- A set of cover buttons: Size 30 (large flower), 24 (medium flower), and 20 (small flower). If you do not know how to cover a button you can check out my video tutorial for making cover button earrings here.
- Sewing needle and thread
**Cutting the Fabric**
- A Fat Quarter is approximately 18”x22”. I began by folding it in half (short side to short side) and placed it on my cutting mat. Because I wanted to pin and cut out all three flower sizes at once with as little fabric waste as possible I then cut my material at 6 ½ inches and then in a half again at 3 ¼ inches. Now I have two pieces of fabric measuring 3 ¼” x 22”. I’ve kept the fabric folded in half the entire time so that what I see is a 3 ¼ x 11 inch piece that will hold all three of my flowers perfectly with very little waste.
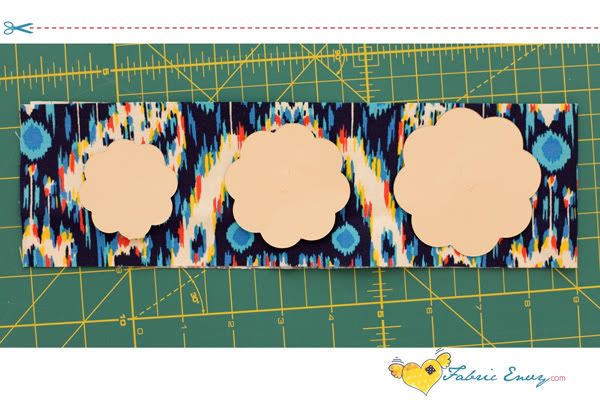
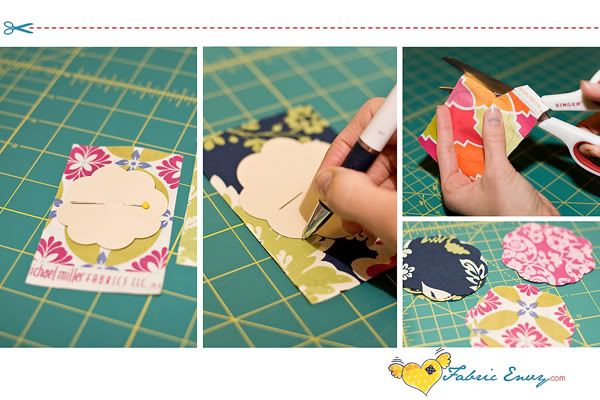
- Keep your fabric folded and pin all three flower templates into place ( the picture shows all three different sizes, you can easily print out extra templates and cut them all the same size during this step). This will allow you to cut out two of each size at once. You’ll end up with a total of six petals. Be sure to save pieces of your scraps to make the cover buttons!
- Do this with the rest of your fabric assortment until you have at least 12 petals to complete one flower. I cut out 36 flower petals because I wanted to make all three sizes at once. Just cut out 12 of the same sized template if you want to make one flower.
**Putting the Flower Together**
- Get out your needle, and thread it with a long piece of coordinating thread.
- Take a moment to decide how you want the colors to look. Once you’ve chosen how to blend your fabrics you’ll begin to layer the flower.
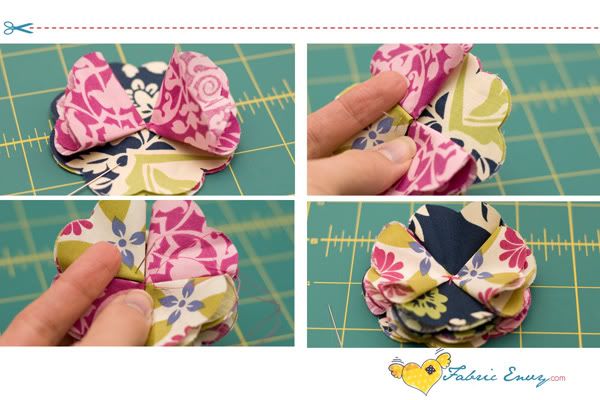
- Stack up 4 petals for the base of the flower
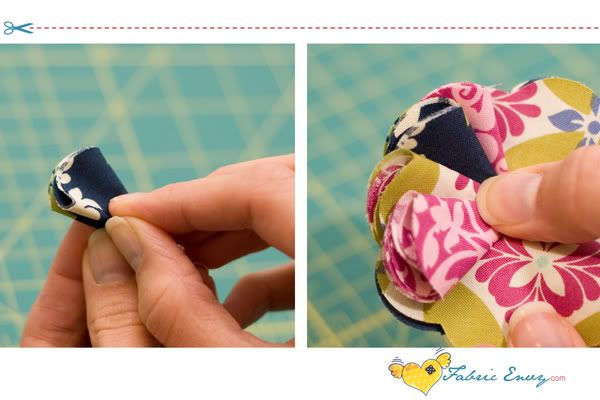
- Take 4 petals and fold into a heart shape (in half 2 times)
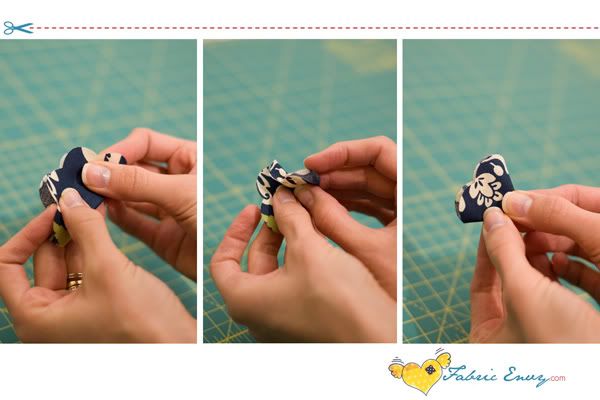

- Now take your needle and thread and grab one of your heart shaped petals and match it up to the petal shape underneath. Tack it down with a simple stitch.
- Next take another petal and place on the opposite side from the first petal and tack it down.
- Now add the third petal, and then the fourth to the opposite side of the third and tack down. I used a simple “X” stitch
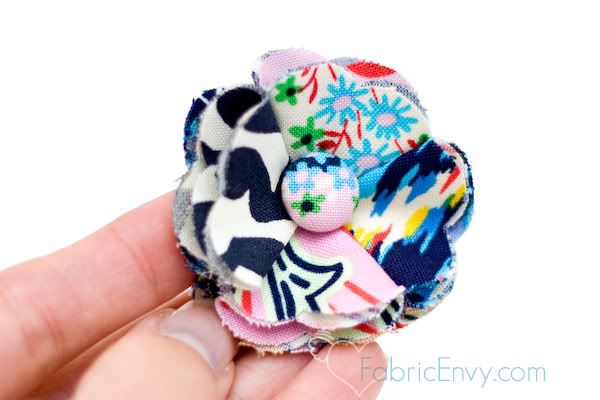
- Do this one more time for a double-layered flower. The thickness makes it super cute!
- Now that the petals are all sewn together set aside and make your cover button. If you never covered a button you can check out my video tutorial here. (www.fabricenvy.blogspot.com, and click on tutorials)
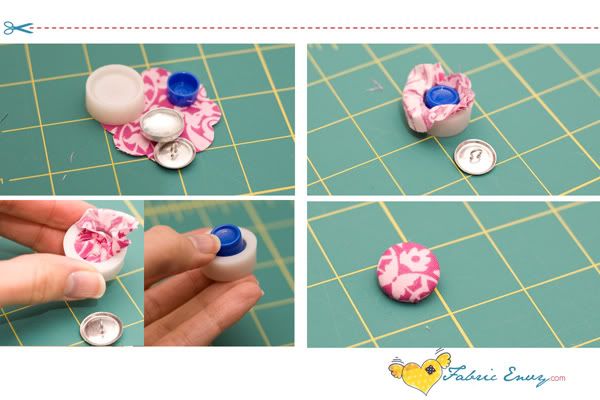
- Now it’s time to add the button to your petals and make the flowers center. Sew the button on by coming up through the bottom of the flower first with your needle and thread and insert it through the shank. Continue to sew until the button is firmly in place.
- Phew, now you have a beautiful flower! If you cut out more petals to make the medium and small flowers, then hop to it!
**To Make this flower**
- You’ll need the same amount of petals for this one: 12
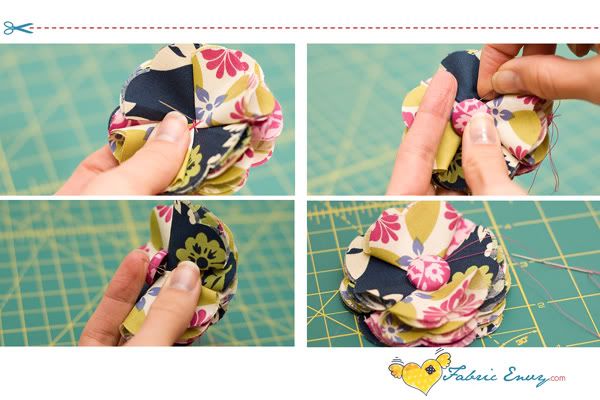
- Stack up 4 petals for the base of the flower
- Fold a few of your petals into heart shapes
- This time instead of tacking them down on opposite sides you’ll layer them on top of each other so that each petal is showing only half of the heart-shape.
- Tack down petals a few at a time and finish the 8th petal by tucking it under the first until it all matches up. Because the flower uses all 8 petals in one layer there’s no need to do a second set.
- Now add your cover button and you’re done!
**Bonus Make Flower Headband**
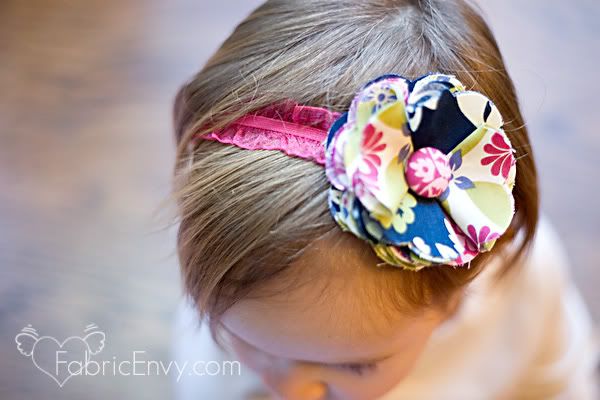
- Now that you’ve got a totally gorgeous flower on hand, you need to decide what the heck you’re going to do with it. I couldn’t help myself and made yet another headband for my daughters to wear. I used Ruffled elastic by Riley Blake in Hot Pink for the band. You can pick it up in my shop, here for only $1.00 a yard!
- Here’s a little guide to help you know what size to cut your elastic:
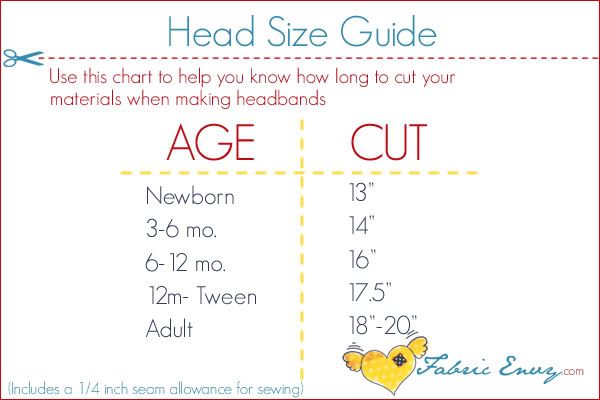
- I cut my elastic at 17.5” to fit my two year old, then brought the two ends together and let it overlap by a ¼ of an inch to give me room to stitch it together.
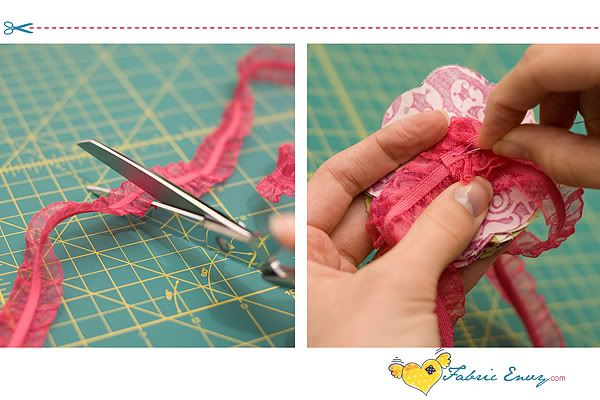
- Once the band is made you can sew your flower on. To finish it off I’ve hot glued on a very small piece of felt on the underside to cover my stitching/work and make it soft on my daughter’s head.
Now sit back and admire your creation you crafty chic!
Happy Sewing!